

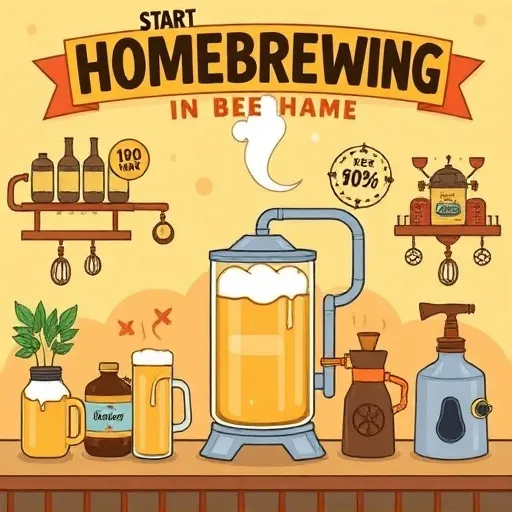
Homebrewing made sim
Why Homebrewing Is Booming in 2026
The homebrewing scene has changed a ton over the past few years. What used to demand a dedicated garage, a propane burner, and a whole lot of patience can now happen right on your kitchen countertop with compact, automated brewing equipment. Industry pros point out that the barrier to entry has never been lower, and honestly, that's a big reason so many people are searching for how to start homebrewing beer at home these days. Modern starter kits are more affordable and more capable than ever, and online communities make it simple to troubleshoot problems in real time. If you've been curious about how to start homebrewing beer at home, the timing really couldn't be better.
There's also a cultural shift at play. Consumers are increasingly curious about how their food and drinks are made, and brewing beer at home is a natural extension of that curiosity. A recent survey among hobbyist communities suggested that the majority of new homebrewers cite "wanting to understand the process" and "creative experimentation" as their top motivations, rather than simply saving money. That's a refreshing shift, and it makes the hobby even more rewarding. Learning how to start homebrewing beer at home isn't just about cutting costs—it's about getting hands-on with fermentation and recipe design in a way that feels genuinely satisfying.
The Core Ingredients and Fermentation Basics Behind How to Start Homebrewing Beer at Home
At its core, homebrewing is the process of making beer on a small scale, typically anywhere from one to ten gallons per batch. Beer is made from four basic ingredients: malted grains (usually barley), water, hops, and yeast. The grain is steeped in hot water to extract sugars, the resulting liquid (called wort) is boiled with hops for bitterness and aroma, then cooled and fermented with yeast, which converts those sugars into alcohol and carbon dioxide. That's the simple version. The deeper you go, the more nuance there is, but the fundamentals stay the same whether you're brewing a simple pale ale or a complex stout. Understanding this basic process is the foundation of everything else when you learn how to start homebrewing beer at home.
Choosing Your Brewing Method: Extract Brewing, Partial Mash, or All-Grain for How to Start Homebrewing Beer at Home
Before you buy anything, you need to decide which brewing approach fits your lifestyle, space, and budget. There are three main paths for beginners in 2026, and picking one is a key early step in how to start homebrewing beer at home.
Extract Brewing is the most beginner-friendly method. Instead of mashing grains yourself, you use malt extract, which is essentially concentrated sugar syrup or powder made from malted barley. You dissolve it in water, add hops, boil, cool, and ferment. It cuts several hours off the brew day and requires less equipment. Many experienced homebrewers still keep extract brewing in their rotation for quick, easy batches.
Partial Mash Brewing is a hybrid approach where you steep a small amount of specialty grains for flavor and color while relying on extract for the bulk of the fermentable sugars. It's a great stepping stone if you want more control over flavor without committing to full all-grain equipment.
All-Grain Brewing is the traditional method where you mash crushed malted grains in hot water to convert starches into sugars yourself. All-grain brewing offers the most control and the widest range of flavor possibilities, but it requires more equipment, more space, and a longer brew day. Most hobbyists eventually graduate to all-grain, but there's no rush. For your very first batch, extract brewing is the smart choice—get a few successful brews under your belt, learn how fermentation works, and then decide if you want to invest in more advanced gear.
Gathering the Right Equipment and Sanitizer for How to Start Homebrewing Beer at Home
You don't need a full brewery to brew beer at home, but you do need the right tools. First up is a fermentation vessel—a food-grade plastic bucket or a glass carboy, and many modern starter kits include a fermenter with an airlock and lid. You'll also need an airlock and stopper to let carbon dioxide escape while keeping oxygen and contaminants out, plus a large brew pot (at least five gallons for a standard batch, stainless steel ideal). Add a long spoon or paddle for stirring during the boil, a hydrometer to measure specific gravity and calculate alcohol content, a thermometer for temperature control, and a dedicated sanitizer—which is non-negotiable, since cleanliness is the single most important factor in successful homebrewing. Round it out with bottling equipment (bottles, caps, a capper, and a bottling wand, or a kegging system if you prefer) and an ingredient kit for your first batch. Many suppliers bundle all of this into complete starter kits, which is often the most cost-effective way to begin—just make sure the kit includes a sanitizer and a hydrometer, since some budget kits skimp on these essentials.
Mastering Sanitation and Cleanliness When You Learn How to Start Homebrewing Beer at Home
If there's one lesson every experienced homebrewer will drill into you, it's this: sanitation is everything. Beer is a fermented beverage that depends on yeast outcompeting other microorganisms. If unwanted bacteria or wild yeast get into your wort, you'll end up with sour, funky, or simply undrinkable beer. Clean everything that will touch your wort after the boil—your fermenter, airlock, siphon, bottling wand, and bottles. Use a dedicated no-rinse sanitizer and follow the instructions carefully. A few extra minutes of sanitizing can save an entire batch, and it's one of the most important habits to build when you're learning how to start homebrewing beer at home.
Brewing Your First Batch: Wort, Hops, and Yeast in How to Start Homebrewing Beer at Home
Once you have your equipment and ingredients, the brew day itself is straightforward. Start with clean, good-tasting water—if your tap water has a strong chlorine or mineral profile, consider filtered or bottled water. Bring about two to three gallons to a boil in your brew pot, then remove it from the heat and stir in your malt extract thoroughly to dissolve it and prevent scorching. Return the pot to the heat and bring it back to a boil. Add hops at different times—early additions contribute bitterness, while later additions contribute aroma and flavor—following your recipe or kit instructions closely, since a typical boil lasts 60 minutes. After the boil, cool the wort rapidly; an immersion wort chiller is fastest, but a cold water bath works too, and rapid cooling helps prevent contamination and improves clarity. Once the wort is below about 70°F (21°C), transfer it to your sanitized fermenter, top it up with clean water to your target volume, and pitch your yeast. Seal it with the lid and airlock, then give it a good shake to aerate it—the yeast needs oxygen to multiply during the early stages of fermentation.
Fermentation, Hydrometer Readings, and Patience in How to Start Homebrewing Beer at Home
Fermentation is where the magic happens. Yeast consumes the sugars in the wort and produces alcohol, carbon dioxide, and flavor compounds. The ideal fermentation temperature depends on the yeast strain, but most ales ferment comfortably between 65°F and 72°F (18°C to 22°C). Lagers require cooler temperatures, usually around 50°F to 55°F (10°C to 13°C), which is why beginners typically start with ales. Keep your fermenter in a dark, temperature-stable location. Within 24 to 48 hours, you should see activity in the airlock as carbon dioxide escapes. Fermentation typically takes one to two weeks for ales, and you should resist the urge to open the lid repeatedly—every peek risks introducing oxygen or contaminants. Use your hydrometer to check the specific gravity after about a week; when the reading stays consistent over two or three days, fermentation is likely complete, and this is also how you calculate your beer's alcohol by volume (ABV).
Bottling, Priming Sugar, and Carbonation for How to Start Homebrewing Beer at Home
Once fermentation is finished, it's time to package your beer. For most beginners, bottling is the way to go. Sanitize all your bottles, caps, and bottling equipment, then dissolve a small amount of priming sugar in boiling water and gently mix it into your beer—this sugar gives the yeast a final meal to produce carbon dioxide inside the bottle, creating carbonation. Siphon the beer into bottles, leaving about an inch of headspace, and cap them. Store the bottles at room temperature for about two weeks to let carbonation develop, then chill a bottle and taste it. If it's under-carbonated, give it another week. Once carbonated, store your bottles in a cool, dark place.
Common Beginner Mistakes to Avoid and Where to Find Ingredients and Community
A few beginner mistakes can trip you up: skipping sanitation (the number one cause of ruined batches), fermenting too warm (which produces off-flavors), opening the fermenter too often, bottling too early (which causes over-carbonated, gushing bottles or even bottle bombs), not taking notes, and expecting perfection on batch one. Record everything—temperatures, timings, gravity readings, tasting notes—because that's how you improve batch after batch. In 2026, sourcing supplies is easier than ever: local homebrew supply shops still exist in many areas and offer valuable advice, while online retailers provide everything from ingredient kits to specialized equipment. Many popular platforms host active homebrewing forums and video channels where hobbyists share recipes, troubleshooting tips, and brew-day walkthroughs. Joining a local homebrew club is one of the best things you can do—clubs offer mentorship, group brews, ingredient bulk buys, and feedback on your beers, and if there isn't one nearby, online communities serve the same purpose. Don't be shy about asking questions—the homebrewing community is famously welcoming to newcomers.
Advanced Directions and Why You Should Just Start Brewing Today
Once you've brewed a few successful batches, the hobby opens up in exciting ways. You might explore yeast starters to improve fermentation health, water chemistry adjustments for specific beer styles, barrel aging, or even kegging systems for easier packaging. Some hobbyists eventually move into all-grain brewing and recipe design from scratch, while others focus on perfecting a single style. There's no wrong path—the beauty of homebrewing is that it scales with your curiosity. Starting to brew beer at home in 2026 is entirely within reach for anyone with reasonable kitchen space, a bit of patience, and a willingness to learn. You don't need to be a scientist or a professional chef—you just need to follow instructions, keep things clean, and pay attention to temperature. Your first batch won't be perfect, and that's fine; the goal is to learn the process, enjoy the journey, and gradually refine your skills. So pick a starter kit, clear a weekend afternoon, and get brewing—your first homemade beer is closer than you think, and now you know exactly how to start homebrewing beer at home.